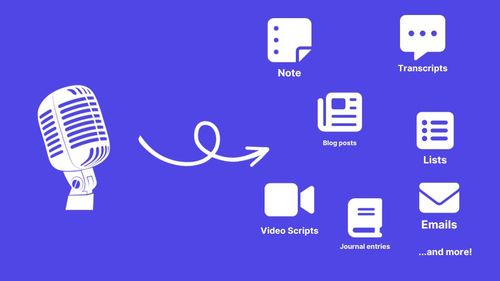
Want to do more with your notes after TalkNotes transcribes and summarizes them? Integrations are the key! Connect TalkNotes to thousands of other apps and build automated workflows to save time and streamline your processes.
This guide covers two primary ways to integrate: using Zapier for easy connections (no-code, low-code) and Webhooks for more custom, direct integrations.
Connecting with Zapier
Zapier is a powerful automation tool that lets you connect TalkNotes to thousands of popular apps without writing any code.
Setting up Zapier:
- Find your Zapier Key: Go to your TalkNotes Settings page. You'll find your unique Zapier API key there. Copy this key.
- Create a Zap: Log in to your Zapier account and click "Create Zap".
- Choose TalkNotes Trigger: Search for the TalkNotes app in Zapier and select it as your trigger app. Choose a trigger event, like "New Note Created".
- Connect Your Account: Zapier will prompt you to connect your TalkNotes account. Paste the API key you copied in step 1. Make sure you use the same email as you use in TalkNotes!
- Set up Actions: Choose the app(s) you want to send your TalkNotes data to and configure the actions.
Example Zapier Workflows:
- Send Summaries to Slack: Trigger on "New Note Created" in TalkNotes, Action: Send Channel Message in Slack with the note's summary and link.
- Create Tasks: Trigger on "New Note Created", Action: Create a task in Todoist, Asana, Trello, or your preferred project management tool using the note title and summary.
- Log Notes in a Spreadsheet: Trigger on "New Note Created", Action: Create Spreadsheet Row in Google Sheets with columns for the date, title, summary, and transcript link.
- Save Transcripts: Trigger on "New Note Created", Action: Upload File in Google Drive or Dropbox using the full transcript text.
Zapier makes it easy to automate common tasks related to your notes. Explore the possibilities!
Using Webhooks
For more direct, custom integrations, TalkNotes supports Webhooks. Webhooks allow TalkNotes to automatically send real-time data (via an HTTP POST request) to a specific URL you provide whenever certain events occur in your account. This is ideal for building custom workflows or integrating with services not available on Zapier.
How Webhooks Work:
- Event Happens: An event occurs in TalkNotes (= a note finishes processing).
- TalkNotes Sends Data: TalkNotes immediately sends an HTTP POST request containing information about that event (the payload) to the Webhook URL you've configured.
- Your Server Receives Data: Your server, listening at that URL, receives the data payload (usually in JSON format).
- You Process the Data: Your server code can then parse this data and perform actions, like updating a database, sending a notification, triggering another process, etc.
Setting Up Your Webhook:
- Create an Endpoint: You need a publicly accessible URL on your server or platform (like a serverless function) that can receive HTTP POST requests.
- Configure in TalkNotes: Go to your TalkNotes Settings page. Find the Webhooks section and enter the URL you created in step 1. Click on Test webhook. If the server returns http/200, TalkNote will save and active the webhook URL and generate a webhook secret for signing the messages.
- Get Your Secret: While configuring, make sure to copy your unique Webhook Secret. You'll need this to verify incoming requests (see below).
Webhook Payload:
When an event triggers your webhook, TalkNotes will send a JSON payload in the request body. Here's an example of a note we've created:
{
  "options": {
    "language_input": "auto",
    "language_output": "auto",
    "style": "note",
    "keep_file": false,
    "language": null,
    "share_audio": false
  },
  "_id": "xxx",
  "owner": "xxx",
  "status": "done",
  "title": "This is the note title.",
  "content": "This is the summary according to the selected style.",
  "style": "summary",
  "tags": [
    "note"
  ],
  "public": false,
  "meta": {
    "source": "web",
    "transcript_tokens": 53,
    "content_tokens": 51,
    "audio_duration": 0.15299048333333332
  },
  "createdAt": "2024-11-19T19:31:55.482Z",
  "updatedAt": "2024-11-19T19:31:59.917Z",
  "__v": 1,
  "transcript": "This is the full transcript."
}
(Note: The actual payload structure might differ slightly. Always inspect the incoming request on your server to confirm the exact fields available for the events you're using.)
Verifying Webhook Signatures (Highly Recommended)
To ensure webhook requests genuinely originate from TalkNotes and haven't been tampered with during transit, we strongly recommend verifying the signature attached to each request. This uses the Webhook Secret you obtained during setup.
How it Works:
TalkNotes signs each webhook payload using your unique secret. You perform the same calculation on your server and compare the results.
Steps for Verification:
- Obtain Your Webhook Secret: Find your unique webhook secret in your TalkNotes integration settings. Keep this secret confidential.
- Check the Signature Header: Every webhook request includes an
X-TalkNotes-SignatureHTTP header. It looks like this:t=<timestamp>,v1=<signature>t: A UNIX timestamp (in milliseconds) of when the request was sent.v1: The HMAC-SHA256 signature calculated by TalkNotes.
- Construct the Signed Payload String: You need to recreate the exact string that TalkNotes signed. Concatenate the following:
- The timestamp value from the header (e.g.,
1678886400000). - A literal dot (
.). - The raw request body exactly as your server received it. Crucially, do not parse or modify the body before verification. Even small changes like whitespace differences will cause verification to fail.
- The timestamp value from the header (e.g.,
- Calculate the Expected Signature: Use your Webhook Secret and the string from step 3 to compute an HMAC-SHA256 hash. The output should be a hexadecimal string.
- Compare Signatures: Use a timing-safe comparison method to check if the signature you calculated matches the
v1signature received in the header. If they match, the request is authentic. If not, discard it. - (Optional but Recommended) Check Timestamp: Compare the timestamp (
t) from the header against your server's current time. Reject requests older than a reasonable tolerance (e.g., 5 minutes) to prevent replay attacks.
Conclusion
Integrating TalkNotes with other tools via Zapier or Webhooks unlocks powerful possibilities for automating your note-processing workflows. Whether you prefer the no-code simplicity of Zapier or the direct control of Webhooks, you can tailor TalkNotes to fit perfectly into your existing systems. Happy automating!